Thank you for visiting Little Schoolhouse in the Suburbs. Please subscribe and you'll get great learning tips and how-to activity articles delivered to your inbox, for free!

Thursday, December 29, 2011

Grading: Bolts


This is one of our favorite activities.  I saw it first in Montessori at Home.  He has a specific set of measurements for grading the bolts, washers, and nuts, but my home improvement store didn't carry those sizes, so I just got the biggest bolt I could find and worked my way down in increments.  The associate on that row must have thought I was crazy.

Anyway, I just used a dollar store tray and sheet of foam with at least six different sized bolts, nuts, and five matching washers.  I have  the kids grade them according to size and then put them together.  At first they tried to do it without grading, but as a larger washer will fit on any of the bolts that are smaller, they got  confused, so grading is necessary. 

Of course my boys HAVE to think outside the box...


 And let's don't forget the bunny ears....


Wednesday, December 28, 2011

Motor Development: Caribeaners

Materials:  4/$1 caribeaners from Walmart, dollar store tray with liner. 

How To: 
1.  Show child how to make a chain.
2.  Unlink chain and place materials back in tray.

Notes:  If I had it to do over again, I would get a LOT more caribeaners and limit the colors.  These could be used for patterning, but I really have too many colors going here. Also, this is a little kid activity.  Even my five year old thought it was too "baby."

Monday, December 26, 2011

Motor Development: Pill (Mint) Cutting


This is perhaps the most popular center I've ever put out!

Materials:  Dollar Tree pill box, Dollar Tree pill cutter, Dollar Tree cookie tray, liner, colored breath mints, bowl for unsatisfactory cuts (according to them, not me)

How to:
1.  Call child over.
2.  Demonstrate cutting a few mints
3.  Sort divided mints by color into the pill box.
4.  Stand back and buy more mints!

They cut...

and cut....

and cut...

I had to resort to finding cheaper mints because they sliced $4 worth the first day!  But, now I have tons of tiny mints to hand out in mass, arranged by color and taste.

Saturday, December 24, 2011

Grading: Sockets


Materials Needed:  A series of sockets decreasing in size (rob hubby's tool box), a Dollar Tree tray liner with paper or foam, small box to hold sockets all mixed.

How To:
1.  Invite child over to see what you have.
2.  Gently pull each socket out of the box and lay on the table all mixed up.
3.  Find the biggest socket and set it on the left side of the paper.
4.  Find the next sized socket and set it beside the largest.
5.  Continue until all of the sockets are in a line.
6.  Place sockets back in the box, mixed for the next time.

I *think* I saw this activity in Montessori At Home.  Some activities I already had and THEN saw them in John's e-book, but I think I got this one from him.

Variations:  Go smallest to largest.  Make a curve.  Stack a tower.  Lace them on a shoelace.

Friday, December 23, 2011

Sorting: Magnets

If you have a magnet around the house, this is the easiest activity to throw together.

Materials:  Magnet (mine is the one used in canning), Dollar Tree Cookie tray, optional labels saying "Magnetic" and "Not Magnetic" (got mine here), a pencil box or bread pan, and crap from your junk drawer.  HA!

How To:
1.  Call child over and show him the box.  
2.  Lay the two signs on a mat like so:

3.  Begin pulling items from the box and testing them, placing in the correct column.
4.  After two or three, say "I'm done testing now" and put them back in the box.


Note:  Once child has determined which items are magnetic a few times, objects generally have to be switched for new items from your junk drawer to keep interest.  I keep the same items out for a week, then if I'm going to re-use the activity the next week, I change out all the items.  

Tuesday, December 20, 2011

Motor Development: Sanding and Screws


Materials Needed:  Dollar Tree tray, Dollar tree ramekin for screws, three screws, small screwdriver, piece of scrap lumber (got mine from the trash can in the cutting section at Lowe's), sanding sponge

Set up and presentation:

1.  Before calling child, assemble materials as shown and make a few starter holes in your lumber.
2.  Call child over and tell him you have something (totally cool) to show him.
3.  Ask child to feel the wood before you sand.
4.  Demonstrate sanding the lumber, with the grain, holding it steady.
5.  Draw child's attention to the powder created and the new feel of the wood.
6.  Then demonstrate placing a screw in a hole and screwing into the wood.
7.  Then unscrew and place it back in the ramekin.
8.  Place materials back on tray so they are ready for the next time.

Motor Development: Whipping Bubbles


This is great for motor skills and entertains children from two to ten.  

Materials Needed:  towel, Dollar Tree boot drying tray, pot, water, dish soap, hand crank beater

How to Set up and Present:

1.  Place all items on tray as shown.
2.  Demonstrate beating* with the hand mixer to create foam.
3.  Demonstrate a small spill and wipe up with towel.

*Child may need help learning to position the beater in vertical position.  

Variations:  
  • Add food coloring to create colored foam.
  • Place in tub so child can create enough foam to over flow the bowl (especially for older children who can REALLY make some bubbles.)
  • Have child use grater and bar soap to add an extra step.

Motor Development: Whisking, Basting, Spatula Bubbles


Materials needed:  two bowls, Dollar Tree ramekins, Dollar Tree baster, Dollar Tree little spatulas, Dollar Tree boot drying tray, whisk, dish towel (not shown), water, dish soap (optional: grater, soap instead of dish liquid)

How to set up the center and present:

1.  Place all materials on tray as seen above.
2.  Tell child that you have something to show them.
3.  Using the whisk, show child how to "draw straight lines on the bottom of the bowl" briskly.  (Pressure on the bottom of the bowl eliminates sloshing.)
4.  Once the bubbles are significant, show child how to scoop the bubbles into the ramekins with the spatula.
5.  Once the bubbles are removed, show child how to move the water into the bowl with the turkey baster.
6.  Wipe out the bowl with the towel.  
7.  Return water to main bowl by pouring, and bubbles by scraping out with spatula.
8.  Wipe out ramekins and small bowl.
9.  Place utensils back on tray and check for spills.
10.  Wipe up with towel.


Monday, December 19, 2011

Go-Togethers: DIY Baric Jars


Materials Needed:  10 clean big baby food jars, spray primer, cheap white, blue, and red acrylic paint, cotton balls, stickers, about $3 in pennies.

1.  Spray the lids and inside of the dry baby food jars with primer and allow to dry.
2.  Pour white acrylic paint in jars and turn to coat.  Drain and dry. (They don't have to be perfect just mostly opaque.)
3.  Paint lids, five red, five white.
4.  Line dry jars with cotton balls and place pennies inside in matching pairs of jars.  I did two of each.  I think I did:  empty, 10, 25, 35, 50.
5.  Cap pairs, one red and one blue.
6.  Put matching stickers on the bottoms.

To set up the center, I put them on Dollar Tree cookie sheets, lined with foam.

1.  Ask child to come see what you have.
2.  Line up the blue jars at the top of the tray.
3.  Pull one jar out and test all of the red ones against it.
4.  Put that pair aside.
5.  Continue with steps 3 & 4 until all jars are matched.
6.  Turn them over to check your work.
7.  Gently place them back on the tray, mixing them up so it will be fun for the next person.

Go-Togethers: $2 Touch Boards


Materials Needed:  somewhat matching floor sample tiles from Home Depot for your poor pitiful kitchen, Dollar Tree sandpaper pack, glue 

1.  Cut two pieces of each grade of sandpaper in the pack
2.  Place matching floor tiles together and glue matching grades of paper to them.
3.  Spread glue very evenly so they don't do this:   

  
4.  Allow to dry completely before taking picture for your website. (Duh)


To use the center:  Assemble in lined tray the matching tiles and a blindfold.  Note:  this center is easiest if you "sensitize" your fingers first.

1.  Ask the child to come over; you have something to show them.
2.  Turn the tiles to the backside and chose one of each pattern.
3.  Place them at the top of the tray in a straight line.
4.  Mix up remaining tiles and place them in a stack below.
5.  Cover or close your eyes.
6.  Pick up first tile at the top of the tray and feel it in a straight down motion, placing it in front of you.
7.  Feel squares from your stack in the same manner until you find one that feels the same.   
8.  Set the match aside and find the next tile at the top of the tray.
9.  Feel squares from the stack and find the match.
10.  Continue until all tiles are matched
11.  Remove blindfold and turn over squares to see if the floor samples match.
12.  Replace tiles on tray and mix up so that they will be fun for the next person.

Saturday, December 17, 2011

My Philosophy: Am I Montessori?


The short answer is: Nope, I just borrow from them.  


Besides, I think my kids are getting too old and lots of the traditional Montessori principles are geared toward pre-schoolers.


My longer answer is based on the10 learning principle list from Living Montessori Now.  See her blog for the fuller explanation of each principle, but here I'll respond to the naked principles individually:


1. Follow the child. 

KINDA.  Montessori schools let the child lead to a great extent.  I have BOTH free choice and assigned work.  Some work is not optional, regardless of the child's mood.  I do, however, try to build activities that correlate with the child's interests and learning style.  I don't make them swim upstream if I can help it.

2. Respect and encourage your child’s absorbent mind and sensitive periods.

KINDA...I'm not sure I completely understand what this looks like for a nine-year-old, but I do let them tell me what they're interested in when it comes to "entertainment" centers that I leave out while I'm working with the others.  Like last week, they all wanted to learn to iron, so we did that and I left out the iron for them to practice.  I do know that anything they perceive as BIG PEOPLE work, they are automatically driven to master, but if it's something they've already mastered, like fingernail clips..."Mom, that's baby stuff."

3. Allow your child the freedom to explore indoors and outdoors – as long as your child is safe and using the freedom in a positive manner. 

Hmmm...I don't really know what this means.  She says it has something to do with self-directed learning.  I'm all over that, but only when they aren't doing assigned school work.  There's no self-directed math around here.

4. Give your child as many opportunities for hands-on learning as possible. 

YES!  This is where I C.A.S.E. Montessori...Copy And Steal Everything.  They have manipulatives galore and every one is beautiful and AMAZING!  My oldest loves the sensorial manipulatives for free "play," but math and reading ones are super confusing to him.  He's a very traditional "drill" responsive kid.  Repetition and bribery is the way to go.  But for my younger two, they HAVE to have manipulatives.  You can repeat the same information every day for the 180 day school year and unless they had a beautiful, interesting, engaging manipulative...it's like pushing a wet rope uphill.  I'd rather just buy the pretty manipulative and avoid all the fights.  Learning  new concepts isn't the time for obedience training.

5. Emphasize practical life and sensorial activities in the preschool years. 

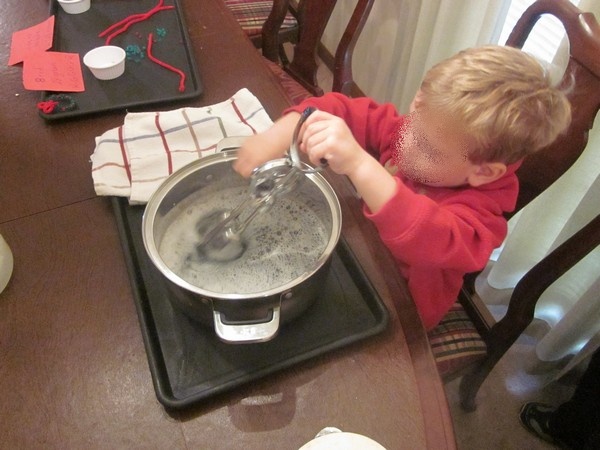
YES!  We aren't in the preschool years but we have sensory issues in the family, so we may never stop emphasizing sensory (smell, visual, touch, etc) centers.  Sometimes these are even assigned to help develop and desensitize them.  And the sensorial/practical activities are my go-to resource for getting them to voluntarily practice math and language foundation skills like sorting, grading, go-togethers, and sequencing.  Real lock and key go-togethers are just as valid as pictures.  Sorting objects by whether they are magnetic or not is just as valid as the traditional cut and paste picture sorting.

.6. Provide child-size materials (and real child-size tools) wherever possible. Place materials on trays on low shelves, allowing your child the opportunity to choose his or her own work and to repeat activities as often as needed.

NO.  I left the rest of her explanation on there because this is where we really differ.  I don't have a dedicated school room, so there's no leaving out anything.  And I only have a limited number of centers I set out each day, like ten.  These are on the dining room table, floor on mats, and the fireplace.  At the end of the school day, they're all packed away into a crate.  And we don't have child-sized materials and tools.  But, my kids are pretty big, so it's not a big issue.  And as I said above, this all refers to the free-choice busy centers in the living room.  There's no free choice when they're working individually with me in the other room. They might have some control over the order, but not whether or not multiplication practice happens.

7. Don’t interrupt your child’s work cycle. Let your child develop an ever-increasing ability to concentrate. 

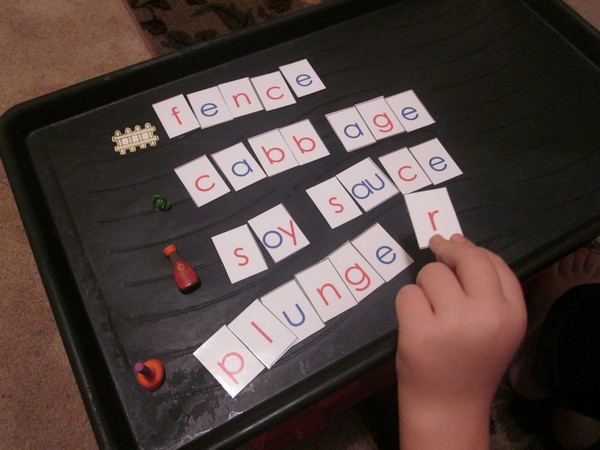
NO and YES.  I definitely interrupt certain subjects.  I won't let a child practice making his letters wrong or reading wrong words out loud.  But as for the free-activities, I leave them to it until it's time to come work with me.  For our school work, I let them think as long as they need or work on a manipulative without interruption.  And, if something really captures their fancy in the language or math lessons, I'll adjust the rest of the day to give them more time. A good example is the object boxes, my daughter will spend lots of time with them, making up and writing down songs, rearranging the words so they make funny compound phrases, and since she struggles in the phonics area, I generally leave her alone to "work."  I just usually put that lesson at the end of the school day so she doesn't have to do anything else afterwards.

8. Make your child’s environment as orderly and attractive as possible. 

YES!  I love how a Montessori school looks.  I use the heck out of all those orderly little trays and mats.

9. Demonstrate how to do an activity. 

YES!  This is my very favorite thing I've learned from Montessori folks.  But it's not something we use during school much.  Before I take the first kid away to work, I demonstrate any new activities, but it's not usually necessary.  My kids can figure most things out since they're older.  However, around the house we use this constantly.  One day, Middle Kid was struggling with sweeping, so I put tape on the floor just like a Montessori school and demonstrated step by step, letting her toss rice krispies on the floor as many times as she liked to practice it. Same for anything else around the house they want to do or "have" to do for chores.  I've done "fixing yourself cereal" demonstrations, "cooking yourself eggs" demonstrations, and we love the Montessori courtesy lessons.  My kids know how to politely interrupt because I demonstrated it and we practiced it.  

10. When you offer an activity, check that the difficulty is isolated
 (for example, it helps if only the color – and not the shape – varies if you’re introducing your child to colors), and there is a control of error (instant feedback built into the activity) whenever possible.

YES!  This is another favorite principle.  I love isolating skills.  This is why I don't cross over between kindergarten writing and reading.  We write uppercase with no discussion of sounds.  We read lowercase, with no attempt at pencil skills.  In older kid phonics, if I'm working on one phoneme, I do my best to exclude all others from the practice words.  For lots of the manipulatives, the activity itself provides the instant feedback, but if not, I mark the underside so they can check themselves without my help.


Literacy: How to Build Object Boxes


I use object boxes A LOT.  I totally stole it from Montessori schools, so don't think I invented this at all.  However, building object boxes can be EXPENSIVE.  Lemme tell ya about how I did it on the cheap and then I'll tell you about what's in the boxes.

Finding cheap objects:

1.  Michaels Craft Stores:  The majority of my objects came from there.  You want four different things:

  • the mini flat wood doodads for gluing on something else wood, usually a display of a hundred tiny drawers.(bus, sun, pig shown above)
  • Crazerasers at $1 each 4-pack assortment (bag, bin, pin, and hat shown above)
  • The kids necklace section (dog, cat, shown above)
  • The 3-d wooden doodad section (egg, pot, bat shown above)
2.  Dollar store:  Only the rat above came from there, but I also got squirty sea creatures for the ray and whale and others, and the bug pack, and some snake and rats.

3.  Hobby Lobby:  Dollhouse miniatures that work out to less than $.50 per usable object. (see mop and lid above)  The tool pack, mops and brooms, pots and pans, food pack, dishes and silverware and a couple of others were the only ones on budget.  

4.  Junk drawers:  screws, bit (shown above), clips, etc were found in piles of nonsense around my home.

TYPES of object boxes:

Materials needed:  objects, lots of plastic bags, sharpie, set of dollar store foam letter puzzles in lower case.

1. Sort objects by beginning sound.  

2.  Separate out those that are multi phonogram, harder to spell words and use them for your initial sound sorting.  Ex:  "Whale" has two things going on.  WH and the silent E.  This makes it really too advanced for teaching the wh or the silent e or using for spelling purposes.  But since initial sound boxes are NEVER spelled, a little kid can sort that into a W column for the beginning sound, so my whale went in the W bag.

3.  Toss in a foam letter for sorting purposes.

4.  Next sort out all objects that are three and four letter phonetic words (pig, cat, dog) and put those into a bag for elementary word building once all the letter sounds are learned.

5.  Next sort out all objects that have a single multi-letter phonogram or demonstrate a single spelling rule according to your phonics scheme.  Since this gets pretty complicated trying to find single phonogram words, I will sometimes use objects that have two phonograms but one was already learned a while back.  Ex:  "juice" demonstrates the ui phonogram AND the c,g,job 3 silent e rule.  Since I taught the silent e rule after the "ui" sound, it went in the silent e bag.  Below you can see that I had already taught oy, oi, and er before this lesson, so I didn't mind having those phonograms in my c,g, job 3 bag.


6.  Finally, fill in your bags with leftover doubles and random crap from around your house.  I try to get at least three object per Kindergarten initial letter sound and at least one per multi-letter phonogram (hopefully more).

7.  Put all the odd objects that aren't going to fit your scheme into church busy bags or something.  Crazerasers are a big hit around here.

Literacy: Phonogram Rocks


Materials Needed:  Dollar Tree river rocks, Dollar Tree knick-knack trays and/or empty Dollar Tree Zen Gardens, two paint pens(red for consonants, blue for vowels), matte clear coat spray

How to Make

1. Sort rocks according to size and how many you can fit in your storage system.  You want at least three rocks for vowels and two for each consonant.  I only do one rock for multi-letter phonograms.

2.  Draw on rocks and allow to dry completely.

3.  Spray with hubby's acrylic coat spray stuff.


I use these for teaching introducing new phonograms.  I don't use them for mass word building.  There just aren't enough rocks.  I use a printed alphabet for that.


In addition to the phonograms themselves, I also made a few rocks for symbols.  Our program has you underline long vowels and put numbers below your silent "e".  See an example below.


But the thing that I use them MOST for is our daily phonogram dictation.  Below, she is quizzing herself on the sounds, and only those she knows are invited to the "party" at the top of the mat.  The first picture in this post is another way we quiz.  I say, "Put all the "er" sounds in the box."  Or I say, "Put ch, k, sh away."


I could just have her write or do phonograms orally, but I find that the rocks provide a fuller sensory experience and make everything stick better.


Literacy: Movable Alphabet for Word Building


In Montessori language learning, there is a stage between sound learning and reading.  It's a word analysis exercise that allows the child to build the word without having to read the word.  They can hear the sounds and pull those phonograms from the box, but aren't required to deduce the word from a visual list of sounds.  

This is MAGIC for my daughter.  She is NOT interested in reading.  She is only interested in writing her own story.  I give her objects and she builds the words and arranges them as she sees fit.  

The words shown in this post are too easy for her, but she deigned to build them so I could take a picture.  


Later in the week, after the initial phonogram lesson with the rocks, we use objects or pictures and practice building those words that use the phonograms or spelling rules we're learning.  


If you want to make your own set, and you use Spalding like me, I recommend printing out this set rather than making your own like I did.  I first printed out this set because I'm a sucker for their colors and font, but Montessori doesn't do the phonograms the same way that we do in our program, so every week I have to cut and paste and build rather janky looking sheets (which you can find in my individual phonograpm lesson posts.)  Whatever you do, print out at least 6 of every letter/phonogram and ten of the vowels and common letters.  (I never have enough L's.)

Friday, December 16, 2011

Motor Development, Following Directions: Combination Locks


This center is for OLDER kids.  My nine-year-old spent the day on it.

Materials Needed:  Combination lock, Dollar Store cookie tray, construction paper or foam for liner, written instructions for the combination.

How-To:  
1.  Set up materials as in tray.
2.  Follow your own instructions a few times to make sure they make sense.
3.  Tell child that you have something to show them.
4.  Following your instructions, open the lock and close it.
5.  Allow child to try.  
6.  Expect questions and repeat demonstrations all day long.

Steriognostic: Blind Object Sorting


Materials Needed:  A Dollar Tree tray with liner, blindfold (clothespin if heads too big for the velcro to reach), Dollar Tree ramekins.  Two or three types of objects.  I used cubes from my base ten set, dollar store party favor balls, and my daughters marbles.

How To:

1.  Assemble as seen in the picture above.
2.  Tell child you have something to show them.
3.  Adjust ramekins in front of you and close your eyes.
4.  Sort objects by touch only into the three containers until they are all gone.
5.  Open eyes, pour objects back into large bowl, ready for the next child.

Our School: Second Grade Curriculum


We are enrolled in Mother of Divine Grace homeschool. MODG is a CLASSICAL curriculum.  I am enrolled in their school, but that enrollment allows me some flexibility in curriculum choices if I keep to the school standards.  I definitely organize the school day in my mind differently than they, but the essence is the same.

Here's the original:


Religion:
St. Joseph’s Baltimore Catechism No. 1
St. Joseph's First Communion Catechism
Any Lives of the Saints book

Math
(Option 1): Arithmetic 2 (www.abeka.com)
Arithmetic 2 Tests & Speed Drills (www.abeka.com)
Math-It Set (E.W. Brooks) (www.rainbowresource.com)
(Option 2):
Saxon Math 2 Homeschool Kit (www.saxonhomeschool.com)

Reading/Phonics:
Sound Beginnings: Parent/Teacher Manual (J. Fogassy) (www.ourfathershouse.biz)
The Harp and Laurel Wreath (ed. Berquist)

Handwriting:
Writing Can Help, Book 1: Introducing Printing and Handwriting (M. Picard)
composition notebook

Poetry:
The Harp and Laurel Wreath (ed. Berquist)
blank book

History:
Paul Revere’s Ride (H.W. Longfellow, ill. Rand)
Squanto, Friend of the Pilgrims (C.R. Bulla)
blank book for Family History (same book used in Geography)
various historical biographies – see Supplementary Materials – These can also be found in
libraries

Geography:
United States Coloring Book (W. Adam, pub. Dover)
The United States of America: A State by State Guide (www.amazon.com)
States & Capitals Flashcards
blank book for maps (same book used in History)

Science:
Science with Plants (pub. Usborne)
Seasons and Living Things (pub. Milliken)
blank book

Art:
Child-Size Masterpieces: Mommy, It’s a Renoir! - Text (Aline D. Wolf)
Child-Size Masterpieces: Mommy, It’s a Renoir! - Advanced Steps 1-3
Discover Crochet Kit (or any How to Crochet Book)
Tissue Paper Flowers (pub. Klutz) OP
Wooden Rosary Holder: Immaculate Heart of Mary
Jesse Tree Kit
First Communion Banner Kit
First Communion Invitation Card Kit (www.illuminatedink.com)
First Communion Thank-You Card Kit (www.illuminatedink.com)
Wooden Rosary Holder: Sacred Heart of Jesus

Music:
First Book of the Recorder Kit
Let’s Learn Music #1
Music Masters Series (choose any 8)
36 Traditional Roman Catholic Hymns


How it shook out for our family:

Religion:
We follow the syllabus, with the addition of a reading about the saint of the day.
Poetry:
We follow the syllabus except we don't copy and illustrate the poem at the end of the whole thing as recommended.  The verse for the week has become her handwriting/copywork.  She traces it twice (www.handwritingworksheets.com) and then copies it into her notebook.  At the end of the week she illustrates that stanza.


Reading:  
Writing Road to Reading and Starting a Spelling Notebook.  We use Option 4 for lesson plans.  If someone has never used Sound Beginnings, I highly recommend it.  There are a few things that I will always teach the Sound Beginnings way, though I use WRTR now for second grade.

I just personally found it super-difficult to get in any practice reading with Sound Beginnings.  The lessons were SO INVOLVED that I didn't have much "do this or else" left in me.  Now, each day, we just go over phonograms, maybe add a couple more, dictate 6-10 words in WRTR, and then split our time between the Faith and Freedom readers from Seton and Dr Seuss easy readers in the evening.  She gets at least 30 minutes a day of practice reading aloud to me. 

Writing:
We follow the syllabus, but if the child is anxious for cursive, we skip the first half of the book.  Even before they know ALL their letters in cursive, though, we start tracing our poetry stanza in cursive two days a week, then copying it into our poetry notebooks to be illustrated on the last day.

'Rithmetic
I followed the syllabus, using Abeka for the first half of the year, but the Abeka style just doesn't work for my kids once the math gets harder.  I should have thought to do Saxon, but I forgot it was recommended.  Currently, we use Math Mammoth, following the internal order.  

Geography
We followed the syllabus for the first half of the year, but all those states coloring pages finally wore on my daughter (who adores coloring, btw).  And, I have yet to ever get to that end of the year history literature.  Doesn't seem to matter, though, since you read them all again next year.  We are elaborating on the family history and mapping projects, looking at google earth maps where family members lived and spending more time investigating the time period.    We do, however, do the states and capitals memorization religiously.

Art, Music
We follow the syllabus for music, minus the Catholic hymns and recorder.  They sing in the church choir, so that covers the hymns and we'll do that recorder thing when they can read well enough to do it all in a room far away from me.  For art, we follow the syllabus, minus a few of the art projects.  We have lots of handwork like weaving, stenciling, braiding, and stitch boards on our busy shelf.  I also add a weekly informal drawing lesson using Kistler's books.

Science
We follow the syllabus for the worksheets, but we garden and keep a nature notebook instead of doing Science with Plants.  Also, our literature readings have LOTS of natural history in them.

30 Minutes of DAILY Reading
Our school recommends 30 minutes a day of read-aloud time.  I do all three kids together.  We split our time between Burgess and Holling C. Holling stories, The Book of Virtues, tall tales and fairy tales, picture books, and the occasional Eggleston history book.  


Thursday, December 15, 2011

Writing Skills: Dollar Store Zen Garden

Little Kid is resistant to writing. He struggles with fine motor. He has problems with pressure and force and so many different aspects of writing that I wanted to reduce the variables and just work on letter formation.

We use Handwriting without Tears which is developed by an Occupational Therapist and follows hand development. Additionally, by learning our capitals to write, it doesn't cross over with our lower case reading and allows him to focus on hand control alone. Letters start on the "smiley face side" or the "not smiley face side."

And with HWT, children learn to write with the frame of a small chalkboard which puts boundaries on the letter and give them a straight edge to push against. I liked that and wanted to have a "frame" on our sand writing as well. (Not to mention keeping the sand corralled.)


Materials Needed: Dollar Tree Zen Garden, a smiley face sticker, chopstick or other stick, paper cut to size, fat writing utensil (crayon or marker), Dollar Tree cookie tray, foam or construction paper for a liner.

How to:

(Stage 1) Place a SMALL amount of sand in the garden. It should barely cover the bottom. You want to see the letters come through well. Allow child to use his finger or perhaps one of the rocks to write.

(Stage 2) Encourage child to use chopstick or the back end of the rake that came with the set to write in the sand.

(Stage 3) Put paper cut to size in the garden. (Oooh, laminated paper and a wipe off marker would be brilliant...must try today.) Make sure it's tight so the writing implement doesn't make it scoot or dig under, hence the need for something FAT to write with.


Phonics Unit: Silent "e" Job 2,3


This week, we did silent E: c, g, job 3 and v, u, job 2.

1.  We started with the a few objects (fence, cabbage, soy sauce, plunge, glue, blue, glove, etc.) and my phonogram rocks.  From there I built a few more word examples without objects. *Note: we'd already mastered OY and AU so I didn't mind having to use them in this lesson.

2.  The next day, I got out my word matching cards: c ( mine ),  g ( mine ),  v ( mine ),  u (mine).   I set them up in groups by rule and she did them one at a time.  

3.  Further exercises:  Mix the cards and match, word building with pictures and objects.


Phonics unit: er, ir, ur, wor, ear


This week, we did er, ir, ur, wor, ear.

1.  I never got good objects for this unit, so we stuck with the cards: er, ir, (lanternfish),  wor, ur (mine, mine) and I haven't found a good set for EAR yet.  I might make one soon.   I set them up in groups by phonogram and she did them one at a time.  

2.  Further exercises:  Mix the cards and match, word building with pictures from the cards.

Phonics Unit: ai, ay, au, aw, ee


This week, we did: ai, ay, aw, au, and ee.

1.  We started with the a few objects (crayon, pail, bee, saw, haunt, ray, deer, spray, etc.) and my phonogram rocks.  From there I built a few more word examples without objects. 

2.  The next day, I got out my word matching cards: ai ( lanternfish ),  ay ( $ ),  aw ( lanternfish ),  au ( $ ), ee ( lanternfish ).   I set them up in groups by rule and she did them one at a time.  

3.  Further exercises:  Mix the cards and match, word building with pictures and objects.  Above you see a "secret word" activity I learned from Montessori.  I put the objects in a pretty box and wrote a word on a slip of paper.  She hunted through the box to find the word I was thinking of. 


Phonics Unit: oy, oi, ew, ui


This week, we did oi, oy, ew, and ui.

1.  We started with the a few objects (fruit, coin, boy, screw) and my phonogram rocks.  From there I built a few more word examples without objects (coil,  jewel, etc.)

2.  The next day, I got out my word matching cards: oy (bought),  oi (mine),  ew (lanternfish),  ui (mine).   I set them up in groups by phonogram and she did them one at a time.  

3.  Further exercises:  Mix the cards and match, word building with pictures from the cards.


Sorting: Battery Testing


We started doing this activity just before I read Montessori at Home.  It's in there too.  Anyway, here's the how to:

Materials Needed:  collection of old batteries, battery tester (~$6 at Depot), cards that say yes, no, and low, foam or paper-lined lipped tray or cookie sheet, bowl, mat.  (last three aren't shown in pic, just my dirty bedroom carpet...gross)

1.  Collect batteries from your junk drawers and place in bowl on cookie sheet with tester and cards. Put whole tray on mat.   
2.  Show child how to lay out the cards on the mat and test each battery.
3.  Place battery in correct column.
4.  Show child how to return batteries to the bowl and replace items on tray.  

Wednesday, December 14, 2011

Motor Development, Sorting: Chopstick Puffballs


My children are older, so be sure your child is ready for this activity before you introduce it to him. If he's too young to manage the sticks on his own, perhaps pick up the little-kid cheater grips from your local sushi restaurant.

Materials needed: Dollar Tree cookie tray, ice cube tray, small loaf pan, Dollar tree puff balls and package of chop sticks, construction paper or foam to line the tray.

How to:

1. Set up tray as shown.
2. Using one of the extra sets of chopstick in the pack, review the proper way to hold chopsticks. Allow child to copy your hands with his own pair and practice the grasp until firm.
3. Demonstrate slowly transferring the puffs from the pan to the ice cube tray.
4. Once the child feels comfortable, you can suggest that he sort them by color.